|
Making a Class Diagram
Open the toolkit as explained earlier and select the Class tab.
A class diagram is essentially an entity-relationship
diagram, where the entities are class with names, attribute and actions.
Class diagrams incorporate certain types of relations, including Generalization,
Association and Aggregation. The tool kit
has a tool bar which features all the elements that can be used to make a
use case diagram.
Working with the Class Diagram Elements
Click on each tab in the tool bar to see all the symbols that the tool kit
supports.
First click on the class tab and then click on
the white screen, You will notice an class element on the screen. Similarly
try clicking all the element on the tool bar and put them on the screen.
Your screen should look like this:
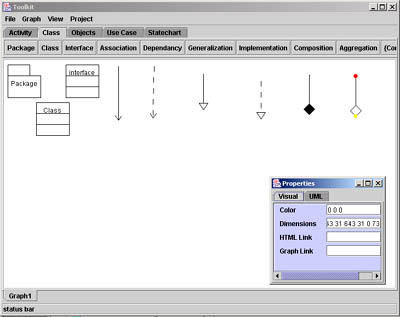
Notice:
-
The properties applet changes for every element,
showing mainly the color, dimensions, HTML link and Graph link. The
class, package and interface elements have more properties such as the name and
color.
-
The properties can be changed by changing the text in
the respective text areas. Notice the changes appearing on the screen.
Changing the Size of the elements
Click on the element, you will notice small green boxes on
the edges of the selected element. Click on those boxes and
simultaneously drag the mouse to adjust its size according to your use.
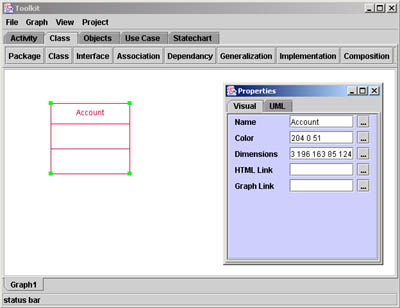
Changing the Properties of a Class Element?
-
Click on the class tab on the tool bar and then click
on the blank screen. You will notice a class element named 'class'
with one row and three columns.
-
Now select the this class element and you will notice
that a 'name' text area in the property applet. Select the text area
and enter the name of the class according to you model. Let us
select 'Account' as the class name and hit the enter key.
-
You can also change the color of this class element.
Notice that next to the color property text area there is a selection
icon. On clicking the icon, a color palette will be displayed. Select
the color of your choice. If you select red you screen should look
like this:
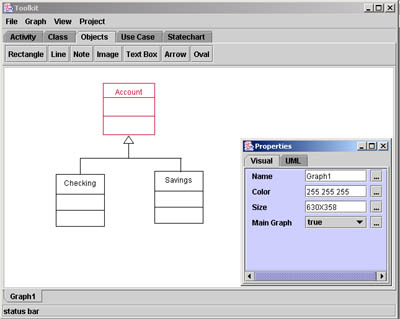
Using Generalization Relationships
Generalization relationships identify classifiers that share common
elements, and are shown by a line with an unfilled whose apex points to a
more general classifier. A super class generalizes a subclass.
Example:
A "Checking Account" and "Saving Account"
classes specialize the upper level "Account" class
-
Continue making on the same screen. Click the class
icon from the tool bar and click the screen. Repeat the same procedure
again.
-
Change the name of the two new classes to
"Checking" and "Saving" using the property applet.
-
Now select the 'Generalization' icon from the tool bar
and place it on the screen according to your class diagram.
-
Click on the yellow or green box to increase the size
or change direction.
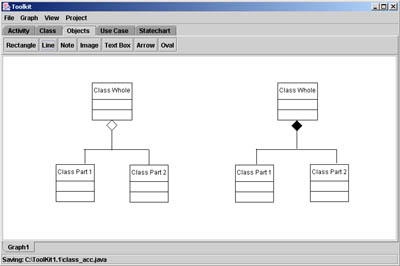
Making Aggregation and Composition Hierarchies
These are whole/part relationships.
-
Select the class icon on the tool bar and click on a
new blank screen. Repeat the process 5 times and arrange the class
elements as shown below.
-
Also change the names of the classes using the
property applet as to what is seen in the figure below.
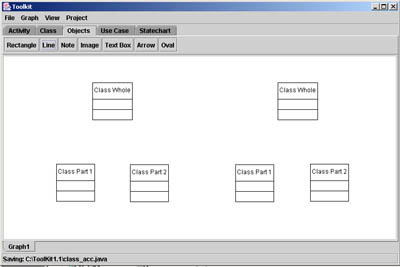
-
Now click on the "Aggregation' icon and place it
below the 'Class Whole' class.
-
Adjust the size and position by using the small
yellow, red and green box that appear when you select the aggregation
element.
-
Follow the same procedure to make the
"Composition" element.
|